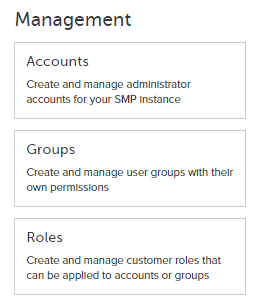
About accounts, groups, and roles
One of the primary functions of the Admin & Rights Module is to facilitate creation and management of accounts, groups, and roles. The dashboards designed to address this work are located in the Management grouping (along with SM Sync) and combine to provide a powerful set of tools for building an account hierarchy that is logical and flexible.
For information on access rights and some supporting workflows, see Access Rights Workflow for Accounts, Groups, and Roles.
Accounts
Accounts represent SessionM Platform users. Each account contains basic information about the user as well as their module-based access rights. Each account shows any of the groups to which the user belongs; group membership defines their access rights via whatever roles have been assigned to the group. But an account can also have access rights specified for the user, each right establishing the type of access the user has been given to the associated module. For example, "Read & Write" access to the Audiences 2.0 module.
The All Accounts dashboard is designed to give you a quick look at the accounts currently configured on the platform. You can easily note the status of each account along with the associated name and email, as shown below:
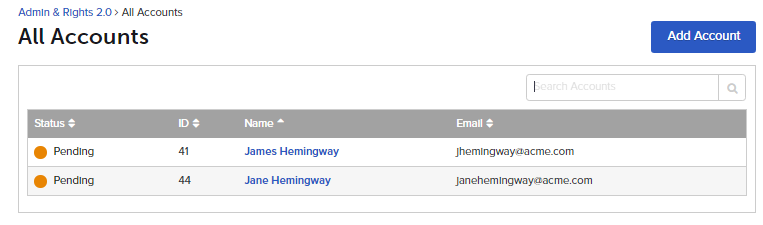
This table displays the individual accounts of each platform user, with the following fields:
- Status - Current status of the platform account. Statuses include:
- Active – Active in your organization.
- Pending – Not yet confirmed by clicking the link in the email sent when the account was created.
- Disabled – Disabled by an administrator.
- ID – Numeric value identifying the account.
- Name – Platform user’s first and last name, entered when the account was created. Click the user’s name to edit the account.
- Email – Email address of the platform user, entered when the account was created.
From this dashboard, you can click the Add Account button to open a page that supports the creation of user accounts. In addition, you can access the set of capabilities defined for the account user by clicking on the name of the user:
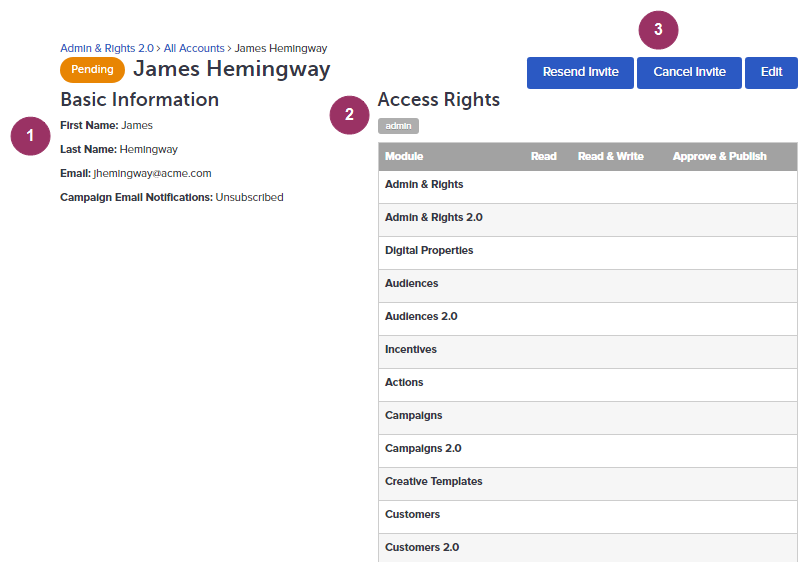
Consult the numbered sections below for the account details presented on this page:
1 - Basic Information
The details in this area of the page reflect basic information about the user account, including name, email, and the account's status, which can be Active, Disabled or Pending. In addition, this basic information also details whether or not the account is configured to receive email notifications from a campaign.2 - Access Rights
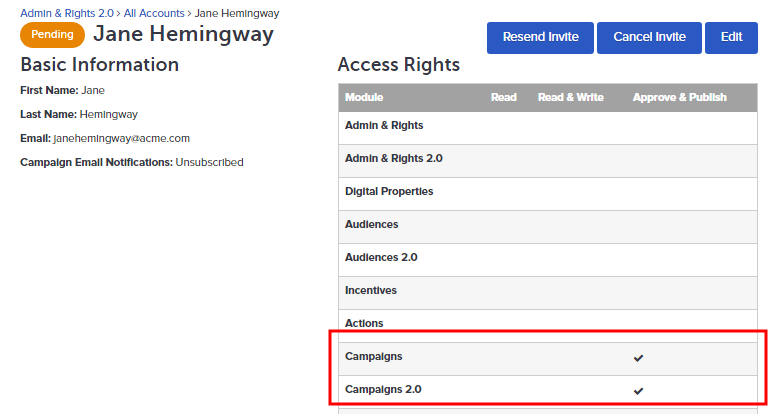
The details in this area of the page describe the account user's access rights, which can be defined via membership in a group and/or via specific module assignments using the table. In this case, James Hemingway belongs to the a group called "admin," the tag for which displays at the top of the Access Rights section. The permissions governing his access to the modules is defined in the group and relies on specific roles that accord read/write/approve/publish access to the platform's modules. Because the access rights are defined in the group, any module-specific rights are not visible in the table.Alternatively, you might consider another case in which the user account is not part of a group and their access rights are determined using functionality for the table (in Edit or Create mode). For example, Jane Hemingway has approve & publish access rights for the Campaigns and Campaigns 2.0 modules, as shown below:
3 - Invite and Edit Buttons
The invitation buttons manage the process by which a user is alerted to the creation of their account via email. While you are prompted to approve the invitation during the process of creating an account, these buttons allow you to resend or cancel the invitation. The Edit button makes the active accounts page editable.
Groups
Groups are the nexus between user accounts and role-based access rights, a potent way of building a permissions scheme for multiple accounts, or members. Unlike the access rights assigned to individual users for specific modules, the access rights given to groups are managed through roles. Each group is defined by its membership and a set of roles.
The All Groups dashboard is designed to provide a high level view of the platform's existing groups. You can easily note the ID and name of each group, as shown below:
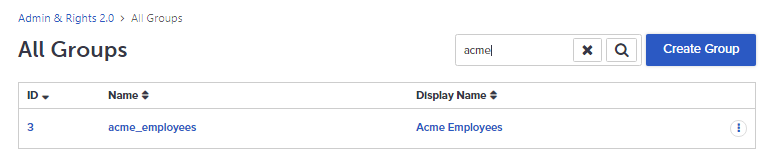
From this dashboard, you can click the quick action link to the far right of the group and access whatever actions correspond to the selected group. For example, Delete. You can also click the Create Group button to open the New Group modal and define a new group. In addition, you can click the name of the group to access its detail page, which shows the existing members of the group as well as the associated roles:
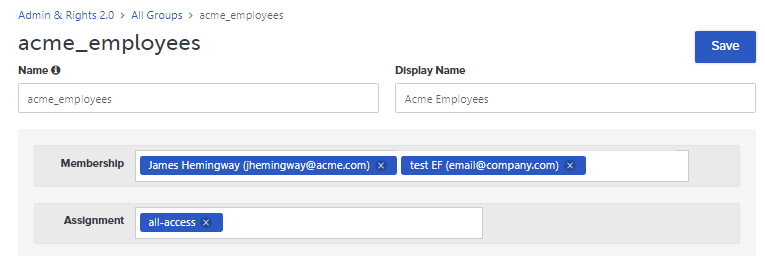
The dropdown for the Membership field populates with the existing account names/email addresses. In the Assignment field, you can pick from whatever roles have been defined for the organization. Each role contains a set of rules that specify what actions can be taken in which modules.
Roles
Roles define access with combinations of ways that users can work with the SessionM Platform. They are collections of rules that associate actions such as "list" and "create" with either modules, such as Campaigns and Customers, or with types of data within modules, such as user profiles, which resides within the Customers Module. Each rule specifies a set of actions that the user can take for a particular module or part of a module.
Ultimately, roles get assigned to groups so that multiple users - all of whom use the platform in a particular way - can be given the same kind of access to the system; no need to manually make assignments on an individual basis every time a new user comes on board. Just assign them to a group with the appropriate pre-defined set of access rights. Many roles are typical across all organizations using the SessionM Platform. For example, all of the folks tasked with creating and maintaining campaigns.
The All Roles dashboard is designed to provide a high level view of the platform's existing roles. You can easily note the ID and name of each role, as shown below:
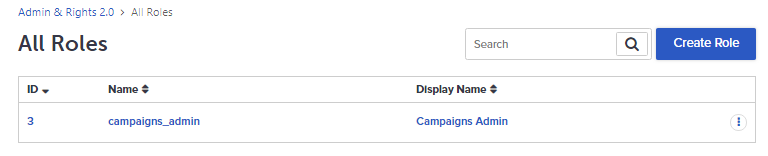
From this dashboard, you can click the quick action link to the far right of the role and access whatever actions correspond to the selected role. For example, Delete. You can also click the Create Role button to open the New Role modal and define a new role. In addition, you can click the name of the role to access its detail page, which shows the existing rules for the role:
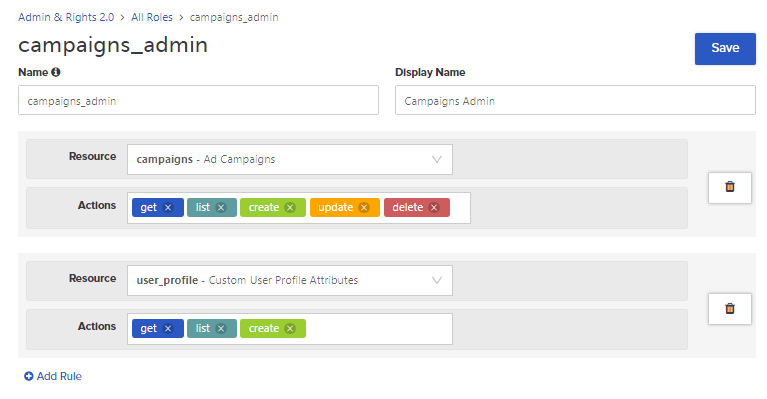
Each rule is a coupling of a resource with a set of actions. Resources can be quite granular. Note that in the image above, the resource is not campaigns in general but, specifically, ad campaigns. So, for the "campaigns_admin" role, assigned users can retrieve, list, create, update, and delete objects created for ad-based campaigns. However, the ability to update and delete is not given to users when they work with custom user profile attributes; for this resource, users can only get, list, and create attributes.